Performax Conversion Process Is Second To None.
Converting a vehicle from left-hand drive (LHD) to right-hand drive (RHD) is a complex and time-consuming process. The steps listed below are an overview of the main stages involved in a right-hand drive conversion.
Source the vehicle & Transport to Australia
Source the vehicle in the USA or Canada, organise import approvals and shipping to Australia, then transport to our factory in Gympie Queensland.
Pre-Conversion Inspection
Check the vehicle over for variables such as dual alternator or different colour dash, inform parts department, they then develop a parts kit, vehicle is washed and photos taken of vehicle before conversion process to insure no scratches or marks are present after the conversion as well as a pre conversion check to see all systems within the vehicle are functioning correctly. The vehicle is then wrapped in protective smash wrap before sent down the production line.
Disassemble The Vehicle
Begin by removing the interior components such as seats, dashboard, heater box as well as exterior front end and steering assembly and any other parts that may obstruct the conversion process or need to be modified or replaced. Parts removed are labelled to the vehicle as well as being bubble wrapped to prevent damage. Parts are then put in their designated locations or taken to the appropriate department to be modified. All critical parts such as a engines intake are plugged to prevent damage.
Interior & Exterior Modification & Installation
Cut out and install the right hand drive firewall and fresh air intake for air-conditioning and seal, install interior sound insulation, modify steering systems to right hand drive, install right hand drive wiring harnesses, install right hand drive brake lines and relocate booster to the right, install right hand drive heater box, install ADR compliant mudflaps, install right hand drive wiper mechanism, install right hand drive wiper cowl, install right hand drive pedals, install right hand drive shifter assembly, relocated park brake and install, install ADR complaint seatbelts, install and modify head and tail lights to Australian standards, install right hand drive dash bar, install right hand drive dash and trimmings, install right hand drive console, install right hand drive door skins, install right hand drive seats.
Quality Check & Wheel Alignments
At Performax we hire a full time QA (Quality Assurance) officer that oversees every job of the production line. Once a job is completed to a professional standard by our conversion technician they tick there job in the book assigned to the vehicle then our QA officer checks the work insuring it is done properly such as torqued bolts checked and marked with pen as well and fitment and finish. Then at the end of the conversion process the vehicle gets a final check over to ensure everything is working and fitting correctly with electronics and air-conditioning functioning correctly in conjunction with making sure nothing has been marked or damaged. The vehicle then goes for wheel alignment and is test driven. Once our QA officer is satisfied the vehicle is then sent to our service department within a different section of the business and gets a pre-delivery inspection which focuses on the mechanical side as well as fit and finish to ensure the vehicle is perfect, it is then test driven again to get a second opinion to ensure verify its flawless driving performance. The vehicle is then plated by our compliance team.
Customer Delivery
The car is detailed and prepared for presentation and handover to the client, following payment completion.
EXAMPLE OF RE-ENGINEERING TO RIGHT HAND DRIVE
STEP 1 - PREPARATION
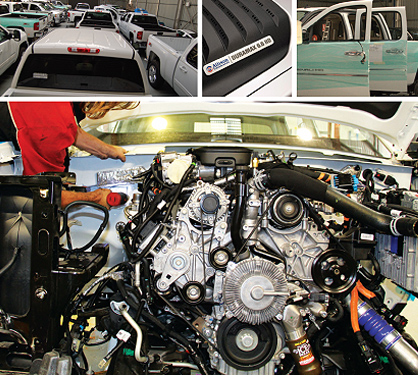
The first step in any vehicle conversion is to meticulously prepare the vehicle. This process begins with thoroughly washing the vehicle to ensure it is clean and ready for detailed work. Following the wash, a comprehensive pre-work inspection is conducted to assess the vehicle's current condition and identify any potential issues. Protective film is then applied to safeguard sensitive areas during the conversion process. Inspection administration is carried out to document all findings and ensure all protocols are followed. Finally, just-in-time (JIT) parts preparation is scheduled to ensure that all necessary components are ready and available exactly when needed, streamlining the conversion process and minimizing delays.


STEP 2 - STRIP THE VEHICLE
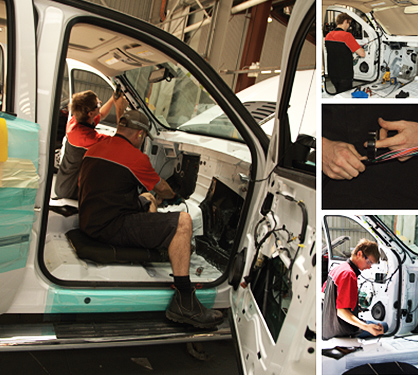
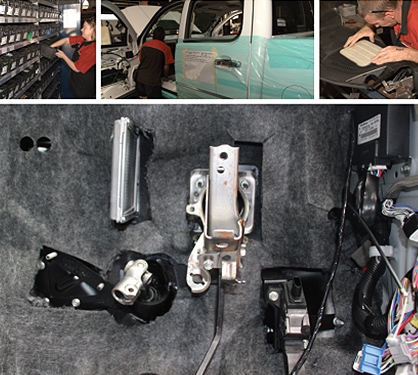
Stripping the vehicle for conversion is a relatively simple yet meticulous process that requires precise cataloging of parts and other mechanical features. This includes removing the urea tank, stripping both the exterior and interior of the vehicle, and safely wrapping and storing parts. Additionally, interiors are cut out, and fresh air vents are fitted. Towbars are removed, tail lights and cargo lights are converted, and reverse lights are fitted. The park brake cable is converted, rear mudflaps are installed, and "D's" are removed from the seats and seat belts.
STEP 3 - STEERING CONVERSION
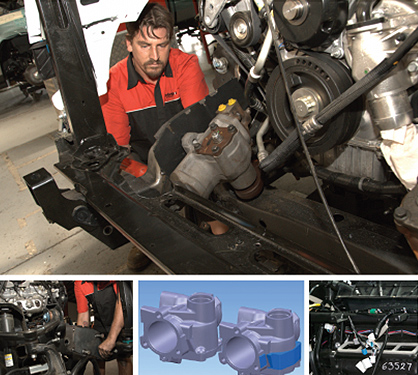
Performax are Australia's leading experts in steering conversions. During this step all care is taken to ensure the change over is of the highest quality and safety standards.
- Remove and fit new power steering box and lines
- Modify brake pedal bracket and fit new bracket to vehicle
- Remove all parts from firewall, prepare and paint the firewall, brackets & pedals
- Fir booster and column boot


STEP 4 - ELECTRONICS CONVERSION
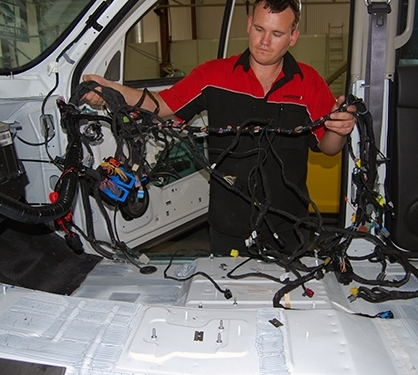
One of the more complex step to the conversion process is the electronics. We inspect everything to ensure the electronics are fitted like new.
- Convert exterior wiring
- Fit HVAC cover, brake lines and indicators and modify interior guards and intercooler pipe
- Convert headlights & modify floor vents
- Modify coolant bottle, transmission lines and fan shroud
- Fit sound damping, modify and fit main wiring harness and HVAC
- Fit original underlay and convert interior wiring before fitting dash bar
- Connect all wiring and convert door trims and power up for testing
- Assemble front of vehicle and fit carpets, jacks, and seat and seat belts
- Refit park brake assembly
STEP 5 - INTERIOR TRIM REFIT
- Convert wiper assembly and fit wiper cowl and wipers
- Fit shifter cable through floor and fit floor air ducting & carpet
- Fit interior and grab handle, foot rests, drip tray, "B" pillars & sill trims
- Adjust brake and power steering bleed and check all fluids
- Fit new speedo face and prepare vents & interior trims & fit dash
- Fit door fabs, switch panels, console, speedo check and tyre calibration
- Check and clear codes and clean interior
- Refit the towbar & urea tank
- Convert Bluetooth microphone

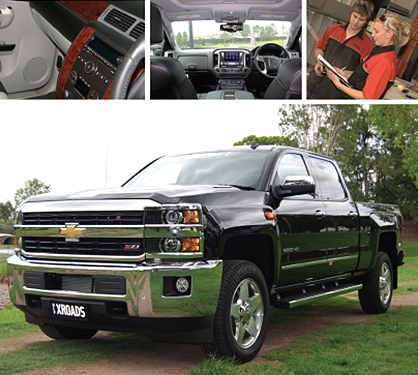

STEP 6 - QUALITY CHECK & DELIVERY
Once the vehicle has passed all previous steps we are ready to begin our extensive quality checks before we deliver the finished vehicle.
- Re-gas air-conditioning
- Wheel alignment
- Remove protective films and wash vehicle
- Full quality assurance review of work and completion or quality documents
- Engineering review
- Presentation and handover to client
